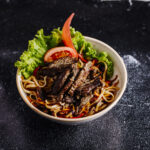
The first time I had a truly transcendent birria quesadilla, I wasn’t in a trendy fusion spot. I was in a bustling, no-frills fondita in Mexico City. The cook, a woman who moved with an economy that defied her small frame, was making them to order. She’d take a freshly made corn tortilla, dip it into a small pot of shimmering, dark red oil, and lay it on the flat-top. She’d sprinkle on cheese, then a spoonful of shredded birria meat. As the cheese hit the hot surface, it didn’t just melt; it wept into the meat and the oil. She’d fold it, and as she pressed it down with her spatula, the edges would sizzle and fuse, becoming one cohesive, molten unit.
I realized then that most of what I’d seen called a birria quesadilla was a pale imitation. They were just tacos, folded in half. The real deal, the soul of the dish, is that moment of fusion—the cheese, the meat, and the rich, spiced birria fat melting together into a single, glorious entity. It’s less a quesadilla and more a savory, hand-held pie.
After years of studying and perfecting this dish, I can tell you that its magic lies in understanding three distinct components: the Meat, the Melt, and the Vessel. This guide is not just a recipe; it’s your blueprint for creating a quesadilla so good, so deeply savory and satisfying, it will ruin all other quesadillas for you.
The Trinity of Flavor: Deconstructing the Components
Before you even think about folding, you need to master the three pillars that make a birria quesadilla sing. Miss one, and the whole structure collapses.
Pillar 1: The Meat (The Soul)
This isn’t just leftover birria. The meat for a perfect quesadilla needs to be prepared specifically for this purpose. It needs to be moist, tender, and, most importantly, well-coated in its flavorful fat.
- The Cut: Use a well-marbled cut like chuck roast or short ribs. The fat renders down and bastes the meat from the inside out.
- The Cook: Slow-cook the meat until it is fall-apart tender. Whether you use a Dutch oven or a pressure cooker, the goal is the same: tender meat and a rich, flavorful cooking liquid.
- The Shred & Reunite: Once cooked, shred the meat with two forks. Then, and this is the insider secret, return the shredded meat to the pot with its cooking liquid (the consommé). Simmer it for another 10-15 minutes. This allows the meat to reabsorb all the flavor and, crucially, become thoroughly coated in that rich, spiced fat. This is what prevents the meat from being dry in the final quesadilla.
Pillar 2: The Melt (The Heart)
This is where most people go wrong. They just sprinkle on shredded cheese. The melt is a system, a carefully constructed blend designed for perfect meltability and flavor.
| Cheese Type | Function | The Insider’s Choice |
|---|---|---|
| Oaxaca | The Flavor Base. Provides a complex, tangy, slightly earthy flavor and a fantastic, stringy melt. | The non-negotiable soul of an authentic quesadilla. |
| Mozzarella | The Pull. Provides the classic, Instagram-worthy cheese pull. Low in flavor, high in meltability. | Use it in combination with Oaxaca, not alone. |
| Monterey Jack | The Creaminess. Adds a silky, smooth texture and a buttery, nutty flavor. | A great addition to balance the tang of Oaxaca. |
The perfect melt is a blend: 2 parts Oaxaca, 1 part Mozzarella, and 1 part Monterey Jack, all shredded. This combination gives you the complex flavor of Oaxaca, the insane cheese pull of Mozzarella, and the creamy texture of Jack.
Pillar 3: The Vessel (The Structure)
The tortilla is more than a wrapper; it’s the structural foundation. The choice between corn and flour is a philosophical one.
- Corn Tortillas: The traditional choice. They have a distinct, earthy flavor and a toothsome texture that holds up well to the rich filling. They are best when toasted or lightly fried on a dry griddle before use, which makes them more pliable and adds a toasted corn flavor.
- Flour Tortillas: The modern, popular choice. They are softer, larger, and easier to fold without tearing. They create a more “cheesy” experience, almost like a grilled cheese sandwich with birria in it.
There is no “better” choice, only a different experience. For a truly authentic birria quesadilla recipe, corn is the way. For maximum cheese pull and ease of assembly, flour is the champion.
The Ritual of Assembly: The Step-by-Step Blueprint
Now that you have your three pillars, here is the professional method for bringing them together. This is the choreography that leads to perfection.
Step 1: The “Red Oil” Preparation
This is the secret weapon you get from the consommé. After you’ve cooked your meat and let it rest, the fat that has risen to the top of the consommé is liquid gold. Skim this fat into a small bowl. This is your birria “red oil.” It’s intensely flavorful and is what you will dip your tortilla in. If your consommé isn’t very fatty, you can enrich it by blending a small amount of the consommé itself with a neutral oil.
Step 2: The First Sear
Do not just build the quesadilla in a dry pan. You need a little fat for a crispy, golden-brown exterior.
- Heat a cast-iron or non-stick skillet over medium heat.
- Lightly brush the skillet with a neutral oil or some of your birria fat.
- Place one tortilla in the pan. Sprinkle a thin layer of your cheese blend over one half.
- Let it cook for 60-90 seconds, until the cheese begins to melt and the bottom of the tortilla is golden brown.
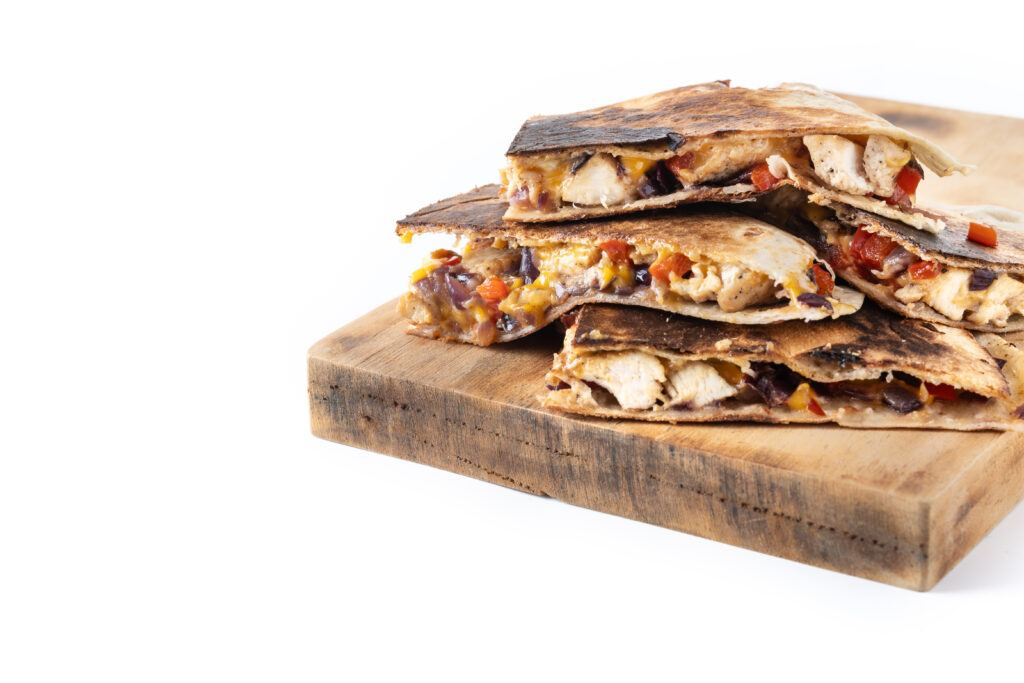
Step 3: The Fusion
This is the moment of truth.
- Spoon a generous amount of your moist, shredded birria meat over the melting cheese.
- Sprinkle another layer of cheese on top of the meat. This top layer of cheese is what acts as the “glue” to fuse the top tortilla.
- Fold the empty half of the tortilla over the filling.
Step 4: The Press and the Crisp
This is how you get that cohesive, sealed edge and that beautiful crispy exterior.
- Using your spatula, press down firmly on the top of the folded quesadilla.
- Let it cook for 2-3 minutes per side, pressing occasionally, until the exterior is deep golden brown, crispy, and the cheese is oozing out the sides in a glorious, controlled way.
- For the ultimate experience, during the last minute of cooking, use a pastry brush to paint the outside of the quesadilla with a little of your reserved birria “red oil.” This adds another layer of flavor and a beautiful sheen.
Step 5: The Rest and the Dip
Do not cut into it immediately! Let it rest on a cutting board for at least 2 minutes. This allows the cheese to set up slightly so it doesn’t all ooze out when you cut it. Serve it with a small bowl of the remaining hot consommé for dipping. This completes the experience, bringing back the moisture and tying all the flavors together.
The Variations: Beyond the Blueprint
Once you have the system, you can create endless variations.
- The Quesabirria: This is the glorious, molten-cheese version. After you place the meat on the first layer of cheese, add an extra generous amount of cheese. Before folding, pour a small amount of the hot consommé right onto the cheese and meat. When you fold and press, the cheese and consommé create an ultra-creamy, molten center.
- The Pizza-dilla: After searing the first tortilla, top it with meat, cheese, and your favorite pizza toppings (diced bell peppers, jalapeños, even pepperoni). Top with the second tortilla and cook like a quesadilla.
- The Chicken Birria Quesadilla: The same principles apply! Use chicken thighs, slow-cooked in a birria-style sauce. The result is lighter but still incredibly flavorful.